Introduction
A virtual network connects nodes over their existing physical links so that they behave as if they were on the same local network. Every node in the network gets an internal IP address from the network's subnet, and can reach any other node on that address regardless of where it is physically located.
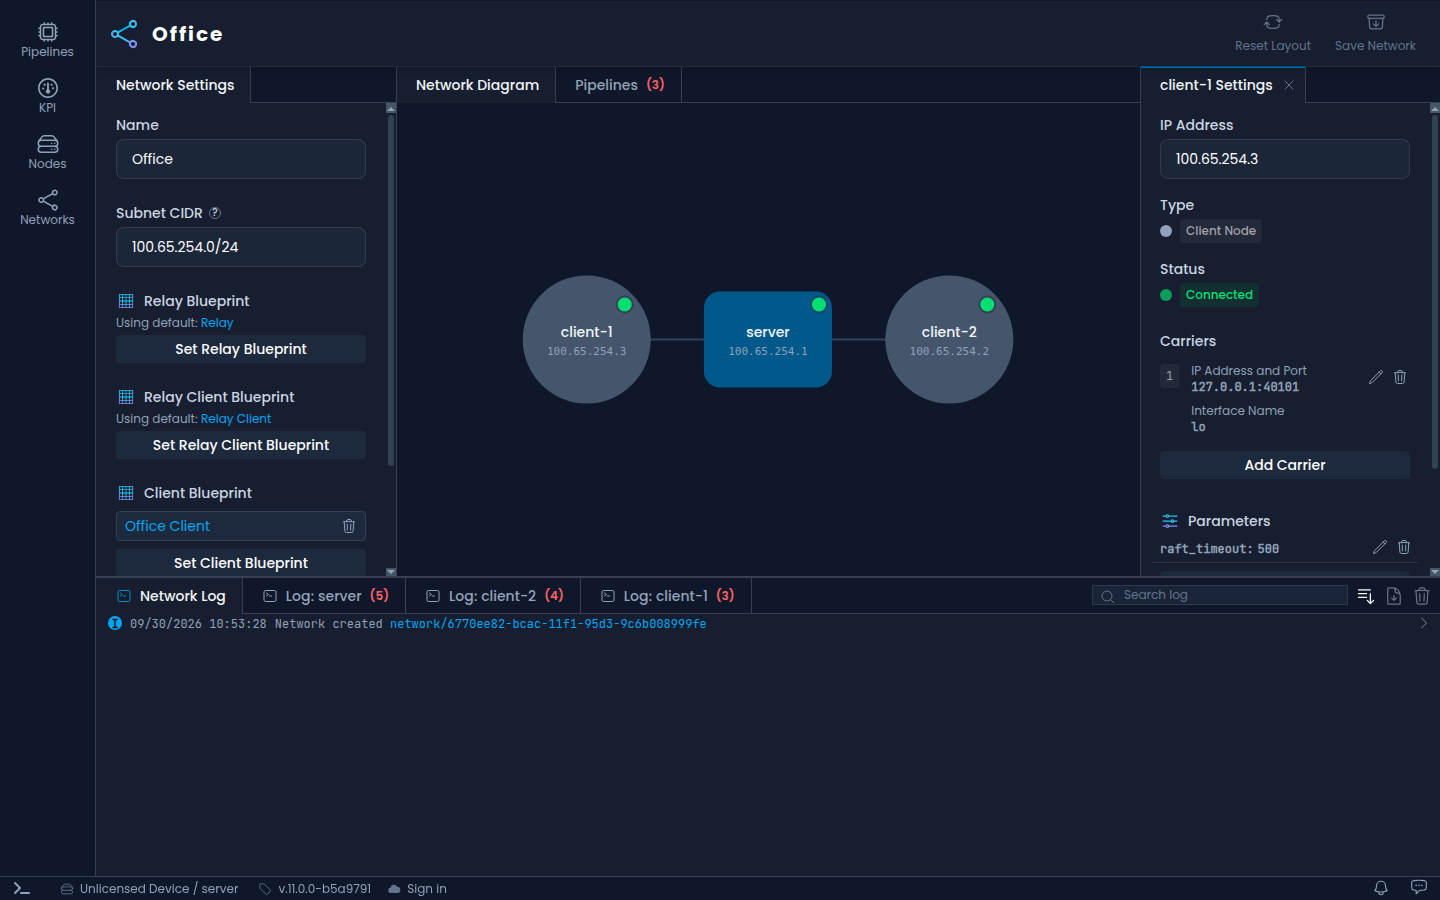
How a network works
Every network is built around one relay node. All traffic between nodes flows through the relay, so the network forms a star. The relay also takes part in the network as a regular member, so it has its own internal IP address like every other node.
Traffic is carried by pipelines that NanoPing generates and deploys for you. They are generated from blueprints, which are pipeline templates. Each blueprint is filled in with the details of a specific network and node, such as IP addresses, carriers and parameters. Three blueprints are used per network:
| Blueprint | Runs on | How many |
|---|---|---|
| Relay | The relay node | One per network |
| Relay Client | The relay node | One per node in the network, including the relay itself |
| Client | Every node in the network, including the relay | One per node |
The generated pipelines appear in the Pipelines list like any other pipeline. They are read-only and named after the network and blueprint, for example Office / Relay, Office / Client and Office / Relay Client / <node ID>.
NanoPing ships with a built-in, read-only set of these blueprints, so a network works without writing any blueprint yourself. See Creating a blueprint when you need to change how the pipelines are built.
A carrier is a physical path a node can use to send network traffic: an IP address and port, a network interface, or both. The relay needs exactly one carrier with an IP address and port that clients can reach. Clients can have several carriers. The built-in blueprints use all of them at once, with the Raft component.
Which nodes are in a network
You don't add nodes to a network by hand. Every node connected to the same hub joins every network automatically. When it joins, it is given:
- the first free IP address in the network's subnet, and
- the carriers listed in its own default carriers configuration, if any.
A node stays in the network until it is removed from the hub.
On a hub of your own, the node that keeps the networks creates them and is their relay. On the cloud hub, the cloud hub keeps them, and you choose a relay for each network.
Next steps
- On a hub of your own, enable networks in the configuration file of the node that will act as the relay. On the cloud hub there is nothing to enable.
- Create a network, give each node a carrier, and save.
- Optionally, customise the blueprints that generate the network's pipelines.